
# Installation
This Software is Abandoned
This documentation is for abandoned software which does not recieve any security updates or support from the community. This documentation has been left accessible for historial reasons.
You should be installing and using Wings in production environments with Pterodactyl Panel 1.0.
WARNING
This specific software is for Pterodactyl v0.7 and must not be used for Pterodactyl v1.0. If you have installed 1.0 you should use Wings instead.
# Supported Systems
| Operating System | Version | Supported | Notes |
|---|---|---|---|
| Ubuntu | 18.04 | ✅ | Documentation written assuming Ubuntu 18.04 as the base OS. |
| 20.04 | ✅ | ||
| CentOS | 7 | ⚠️ | Extra repos are required |
| 8 | ✅ | ||
| Debian | 9 | ✅ | |
| 10 | ✅ |
# System Requirements
In order to run the Daemon you will need a system capable of running Docker containers. Most VPS and almost all dedicated servers should be capable of running Docker, but there are edge cases.
If your provider makes use of Virtuozzo, OpenVZ (or OVZ), or LXC then you will most likely be unable to
run the Daemon. If you are unsure what your host is using there are a couple of options. The easiest is to check
their website, or reach out to their support team.
If you want to take a different approach, try using lscpu and checking what the virtualization type listed is. An
example of this is shown below which shows my hypervisor running with full virtualization — this means it will
support Docker without issues. If you see KVM for the vendor, chances are you're fine as well.
dane@daemon:~$ lscpu | grep 'vendor\|type'
Hypervisor vendor:     VMware
Virtualization type:   full
If that doesn't work for some reason, or you're still unsure, you can also run the command below and as long as it
doesn't report Xen or LXC you're probably okay to continue.
dane@daemon:~$ sudo dmidecode -s system-manufacturer
VMware, Inc.
# Dependencies
Pterodactyl's Daemon requires the following dependencies be installed on your system in order for it to operate.
- Docker
- Nodejs (
v10,v12, higher versions likely work, but are untested) node-gyptarunzipmake,gcc(gcc-c++on CentOS),g++python
# Installing Docker
For a quick install of Docker CE, you can execute the command below:
curl -sSL https://get.docker.com/ | CHANNEL=stable bash
If you would rather do a manual installation, please reference the official Docker documentation for how to install Docker CE on your server. Some quick links are listed below for commonly supported systems.
Check your Kernel
Please be aware that some hosts install a modified kernel that does not support important docker features. Please
check your kernel by running uname -r. If your kernel ends in -xxxx-grs-ipv6-64 or -xxxx-mod-std-ipv6-64 you're
probably using a non-supported kernel. Check our Kernel Modifications guide for details.
# Start Docker on Boot
If you are on an operating system with systemd (Ubuntu 16+, Debian 8+, CentOS 7+) run the command below to have Docker start when you boot your machine.
systemctl enable docker
# Enabling Swap
On most systems, docker will be unable to setup swap space, you can check if this is the case by running docker info.
If it outputs WARNING: No swap limit support near the bottom, this is the case. Enabling swap is completely optional,
but we recommended doing it if you will be hosting for others, and to prevent OOM errors.
To do so, open /etc/default/grub as a root user, and find the line starting with GRUB_CMDLINE_LINUX_DEFAULT. Make
sure the line includes swapaccount=1.
After doing that, simply run sudo update-grub followed by sudo reboot to restart the server and have swap enabled.
Below is an example of what the line should look like, do not copy this line verbatium, it often has additional
OS specific parameters.
GRUB_CMDLINE_LINUX_DEFAULT="swapaccount=1"
# Installing Nodejs
NodeJS is also super easy to install! Simply run the command below to make the package accessible to your system.
curl -sL https://deb.nodesource.com/setup_10.x | sudo -E bash -
apt -y install nodejs make gcc g++
Other OS Distributions
If you are using CentOS, please follow these instructions (opens new window). Ubuntu and Debian users may also follow the official instructions provided by Nodejs (opens new window).
# Installing Daemon Software
This Software is Abandoned
This documentation is for abandoned software which does not recieve any security updates or support from the community. This documentation has been left accessible for historial reasons.
You should be installing and using Wings in production environments with Pterodactyl Panel 1.0.
The first step for installing the daemon is to make sure we have the required directory structure setup. To do so, run the commands below.
mkdir -p /srv/daemon /srv/daemon-data
cd /srv/daemon
OVH/SYS Servers
If you are using a server provided by OVH or SoYouStart please be aware that your main drive space is probably allocated to
/home, and not / by default. Please consider using /home/daemon-data for server data. This can be easily
set when creating the node.
The next step is to download the software and unpack the archive.
curl -L https://github.com/pterodactyl/daemon/releases/download/v0.6.13/daemon.tar.gz | tar --strip-components=1 -xzv
Finally, we need to install the dependencies that allow the Daemon to run properly. This command will most likely take a few minutes to run, please do not interrupt it.
npm install --only=production --no-audit --unsafe-perm
# Configure Daemon
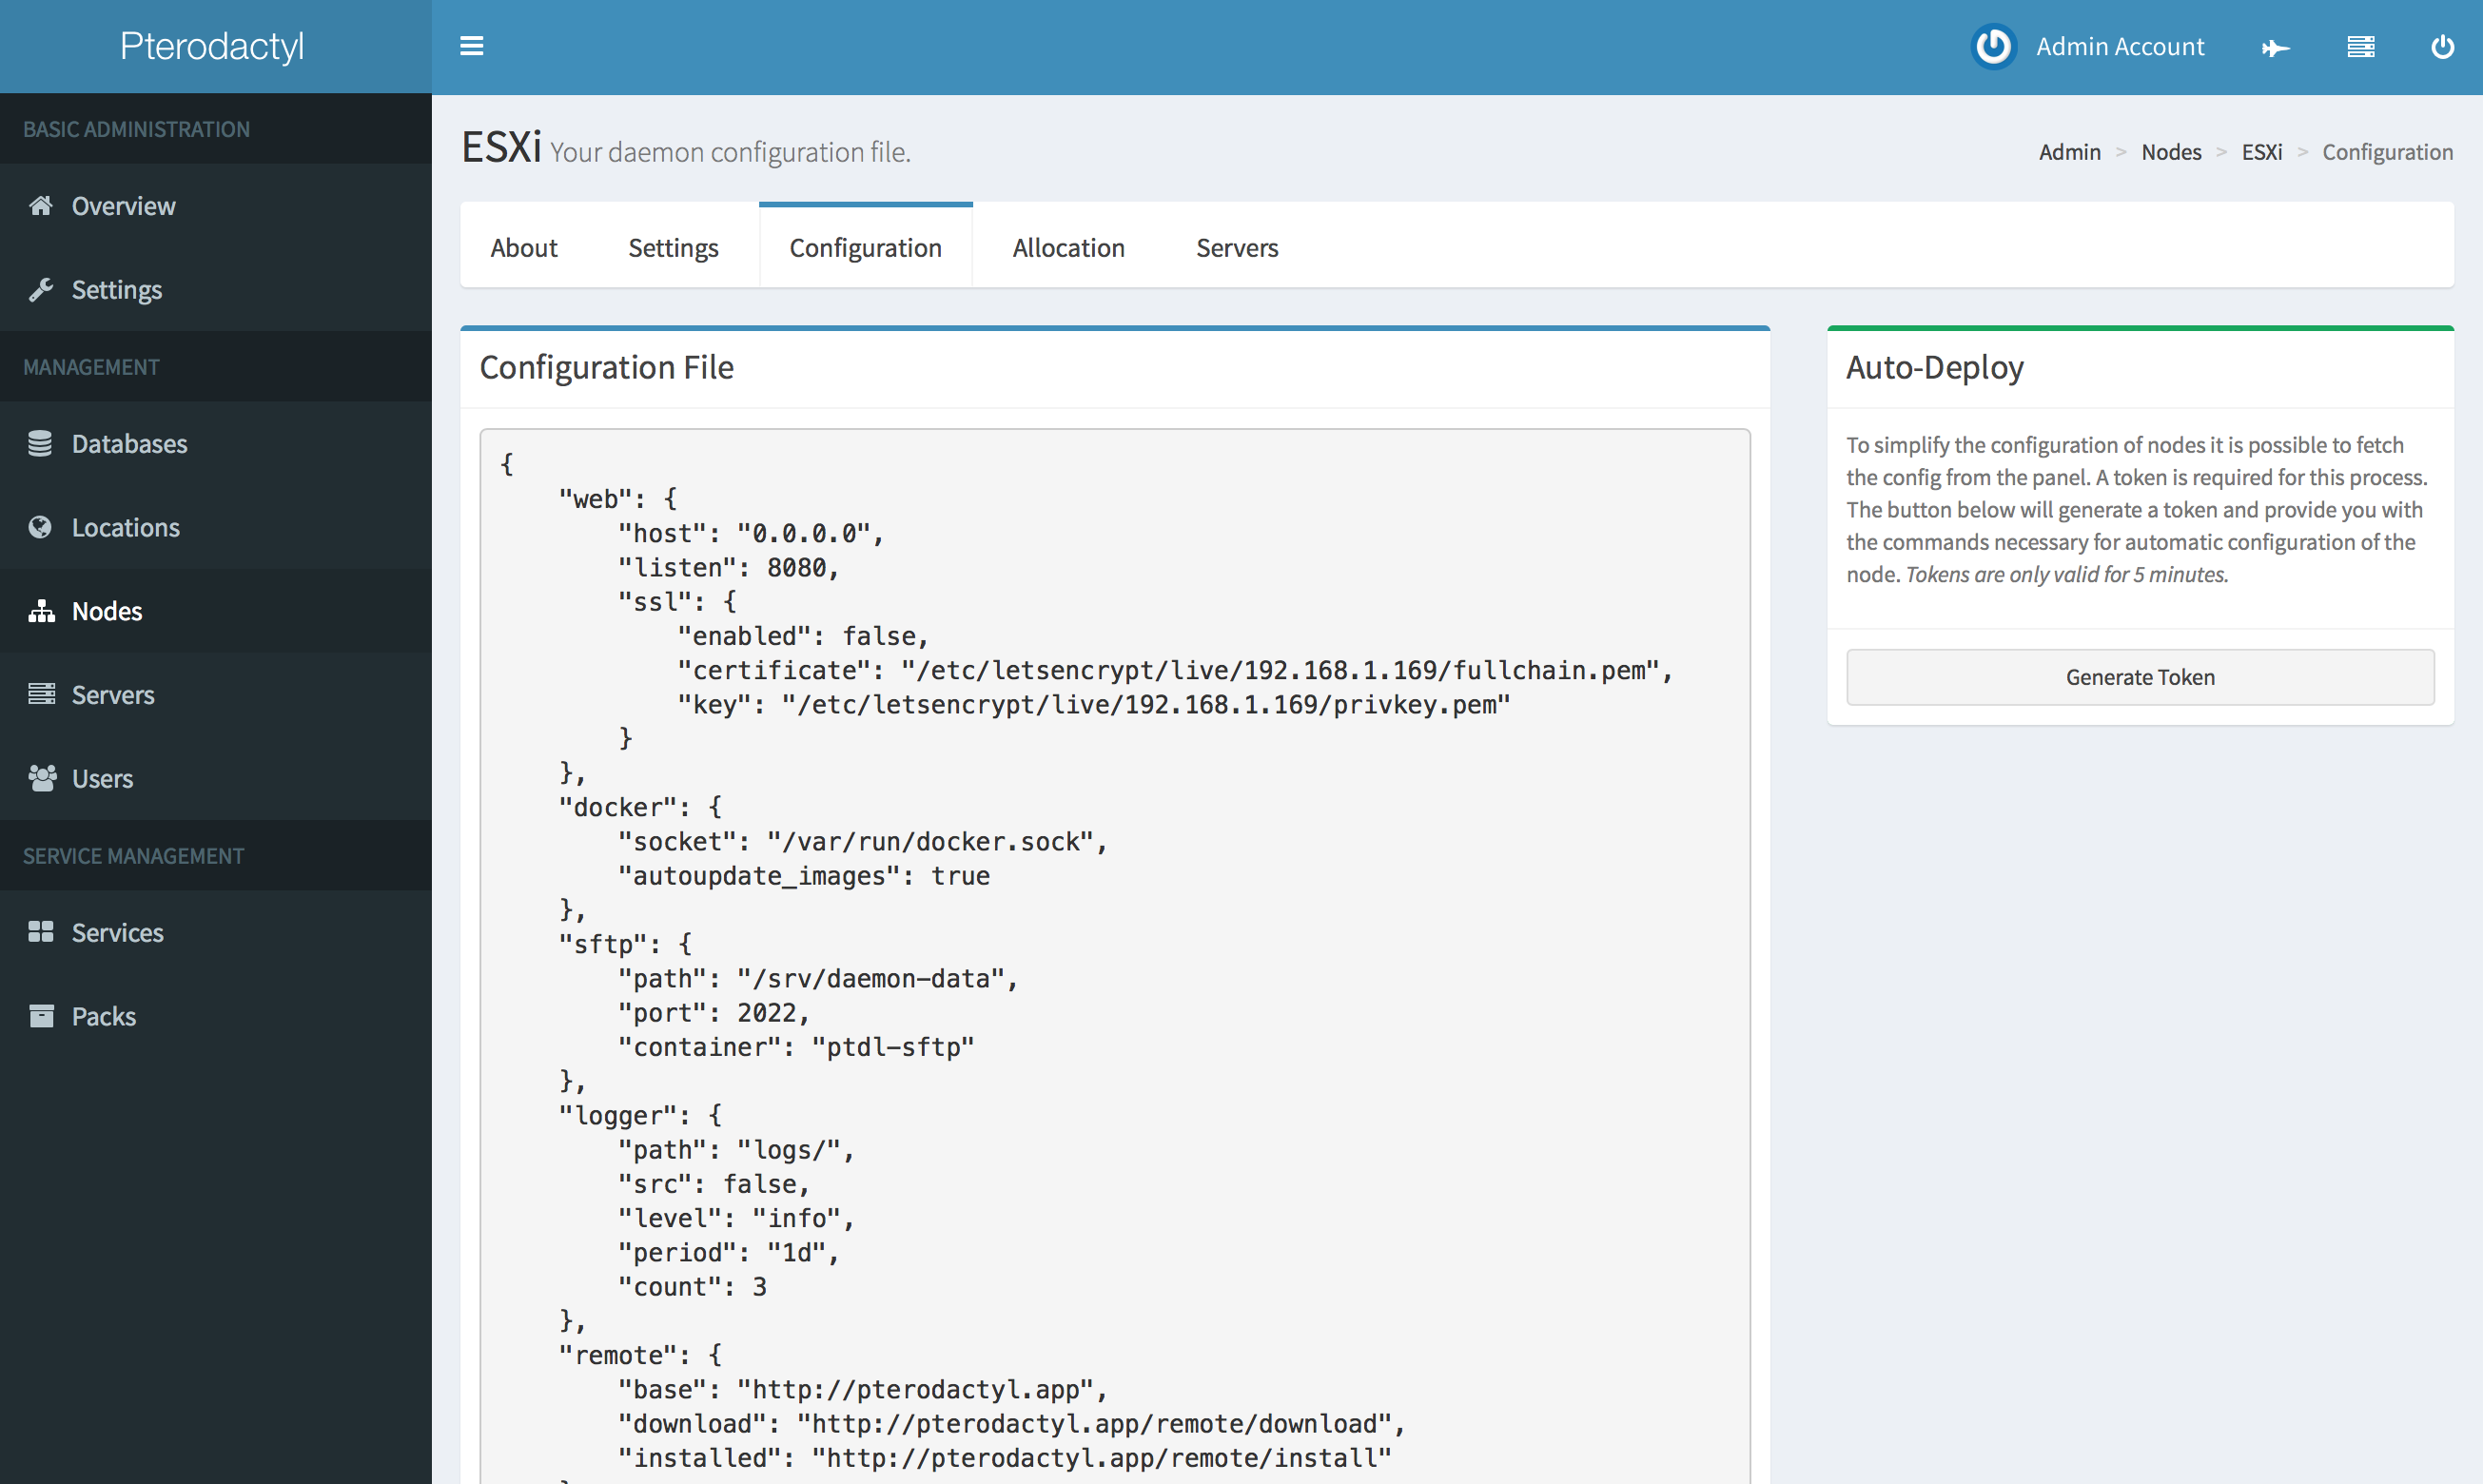
Once you have installed the daemon and required components, the next step is to create a node on your installed Panel Once you have done that there will be a tab called Configuration when you view the node.
Simply copy and paste the code block and paste it into a file called core.json in /srv/daemon/config and save it.
You may also use the Auto-Deployment feature rather than manually creating the files.
# Starting the Daemon
To start your daemon simply move into the daemon directory and run the command below which will start the daemon in
foreground mode. Once you are done, use CTRL+C to terminate the process. Depending on your server's internet connection
pulling and starting the Daemon for the first time may take a few minutes.
sudo npm start
# Daemonizing (using systemd)
Running Pterodactyl Daemon in the background is a simple task, just make sure that it runs without errors before doing
this. Place the contents below in a file called wings.service in the /etc/systemd/system directory.
[Unit]
Description=Pterodactyl Wings Daemon
After=docker.service

[Service]
User=root
#Group=some_group
WorkingDirectory=/srv/daemon
LimitNOFILE=4096
PIDFile=/var/run/wings/daemon.pid
ExecStart=/usr/bin/node /srv/daemon/src/index.js
Restart=on-failure
StartLimitInterval=600

[Install]
WantedBy=multi-user.target
Then, run the commands below to reload systemd and start the daemon.
systemctl enable --now wings