
# Creating a Custom Egg
WARNING
You should not edit existing services or options that ship with the Panel. Each upgrade we push can make minor changes to these, and you'll lose any changes you've made.
The first thing you'll need to do is create a new service. In this case, the name and description speak for themselves.
The Folder Name must be a unique name not being used by any other service, and should only
contain letters, numbers, underscores, and dashes. This is the name of the folder where the daemon will be storing
the service options on the daemon.
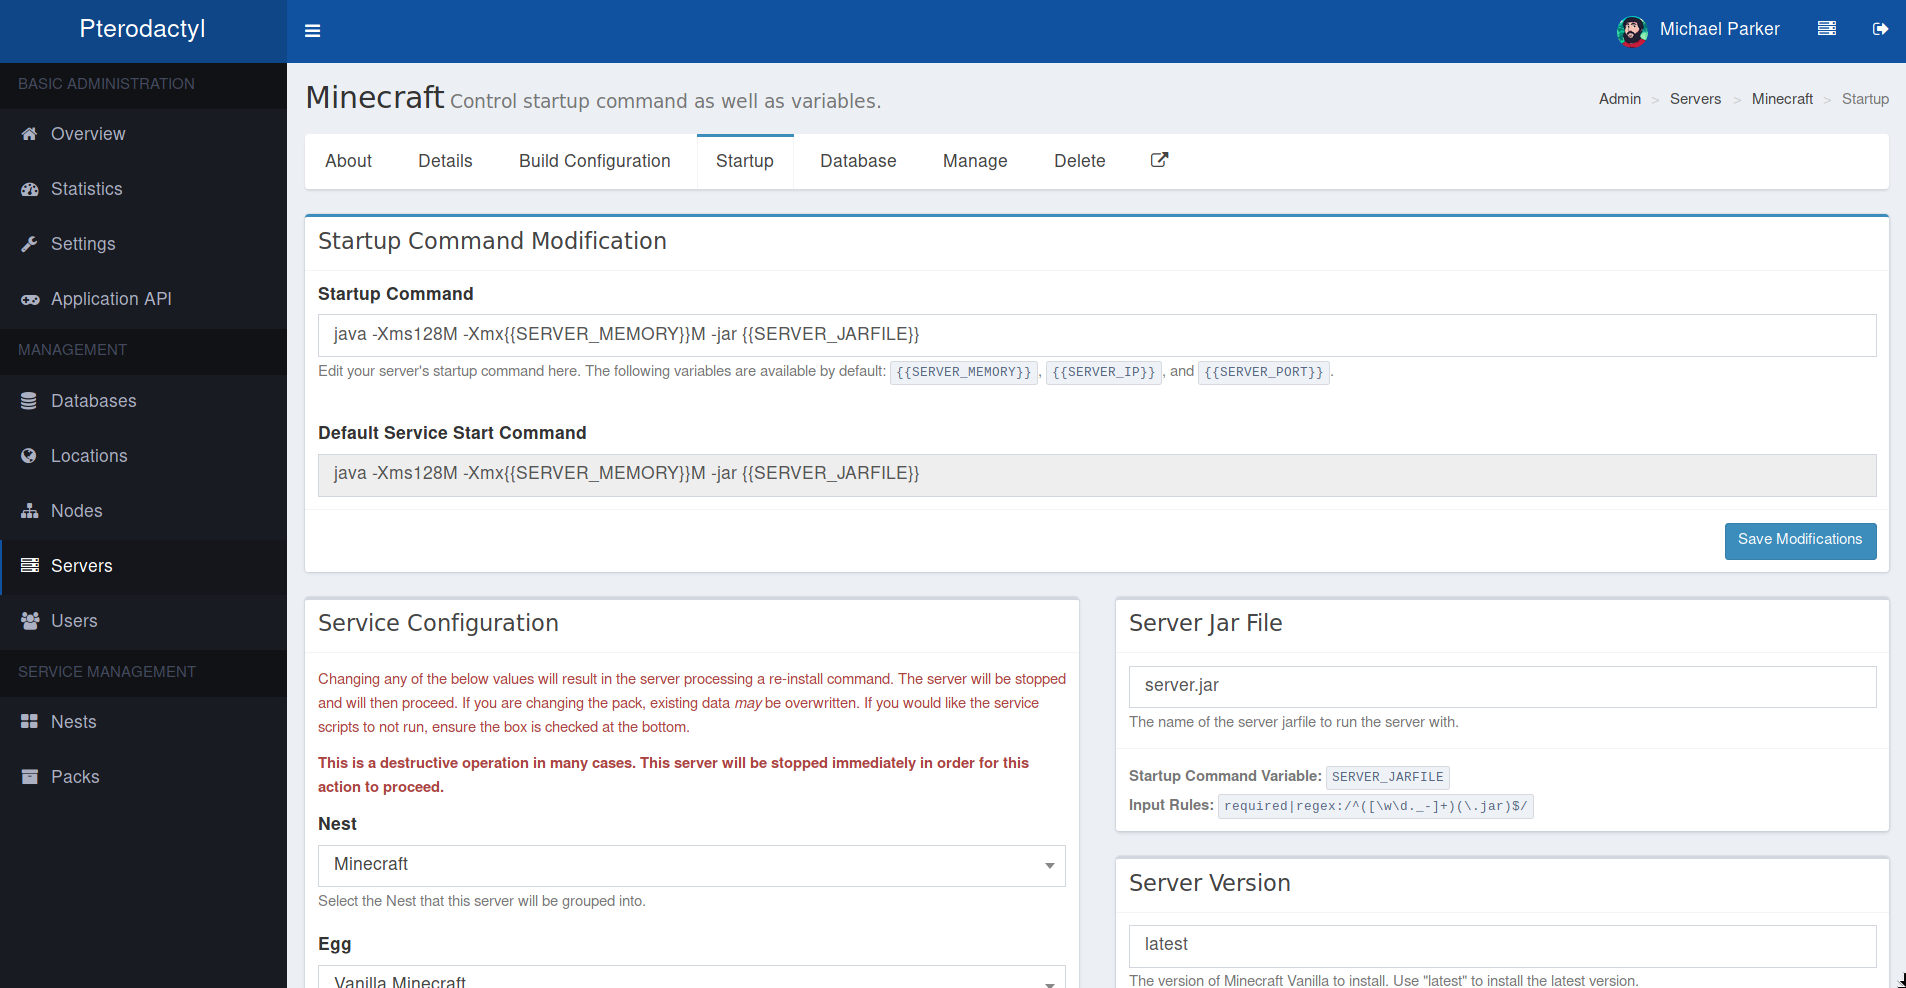
The default start command is also required, however it can be changed per-option.
# Create New Option
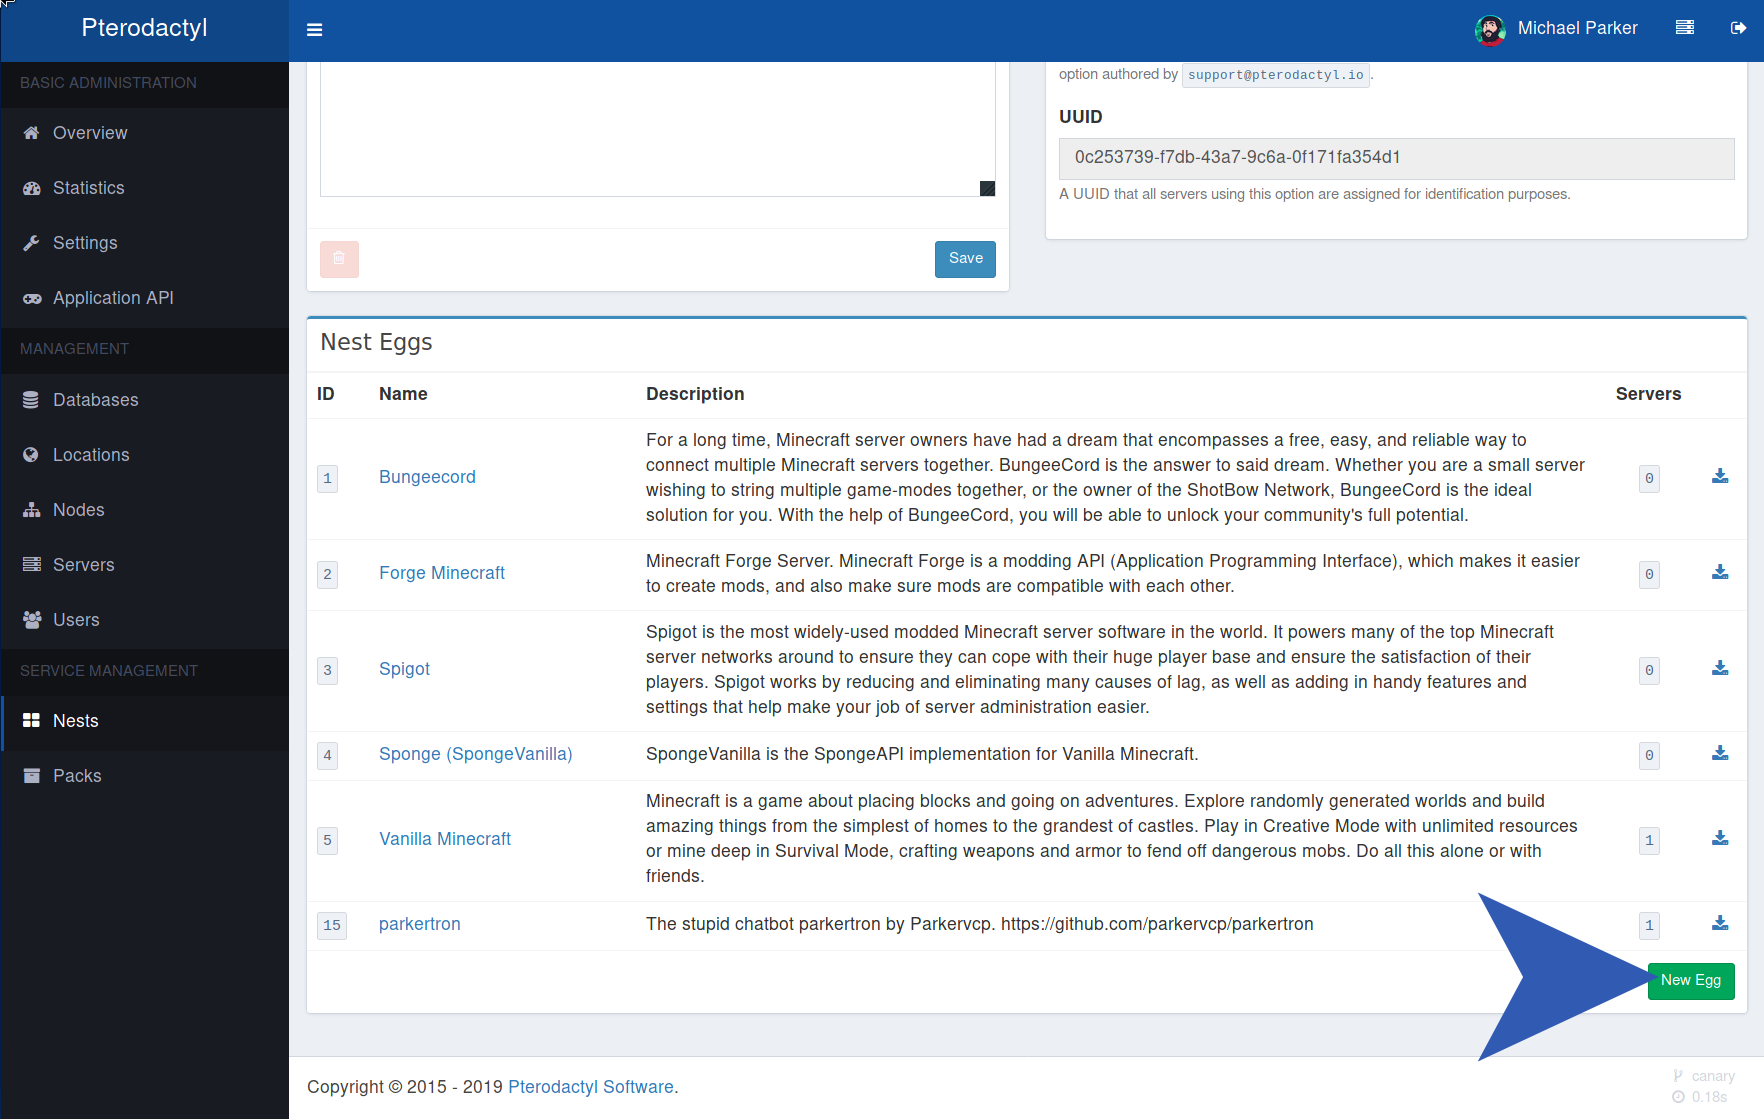
After creating the service, in the bottom right of the page you should see a button titled New Egg, press it.
You will be taken to a new service option page which is where most of the configuration happens. The first thing
you need to do is select your service that you created previously from the Associated Nest dropdown.
After that, enter an Option Name to describe it, in this case I am using Widget. You will also need to provide a
valid docker image, as well as a start command to be assigned to servers under this service option (remember, this
can be tweaked per-server if needed).
Docker images must be specifically designed to work with Pterodactyl Panel. You should read more about that in our Creating a Docker Image guide.
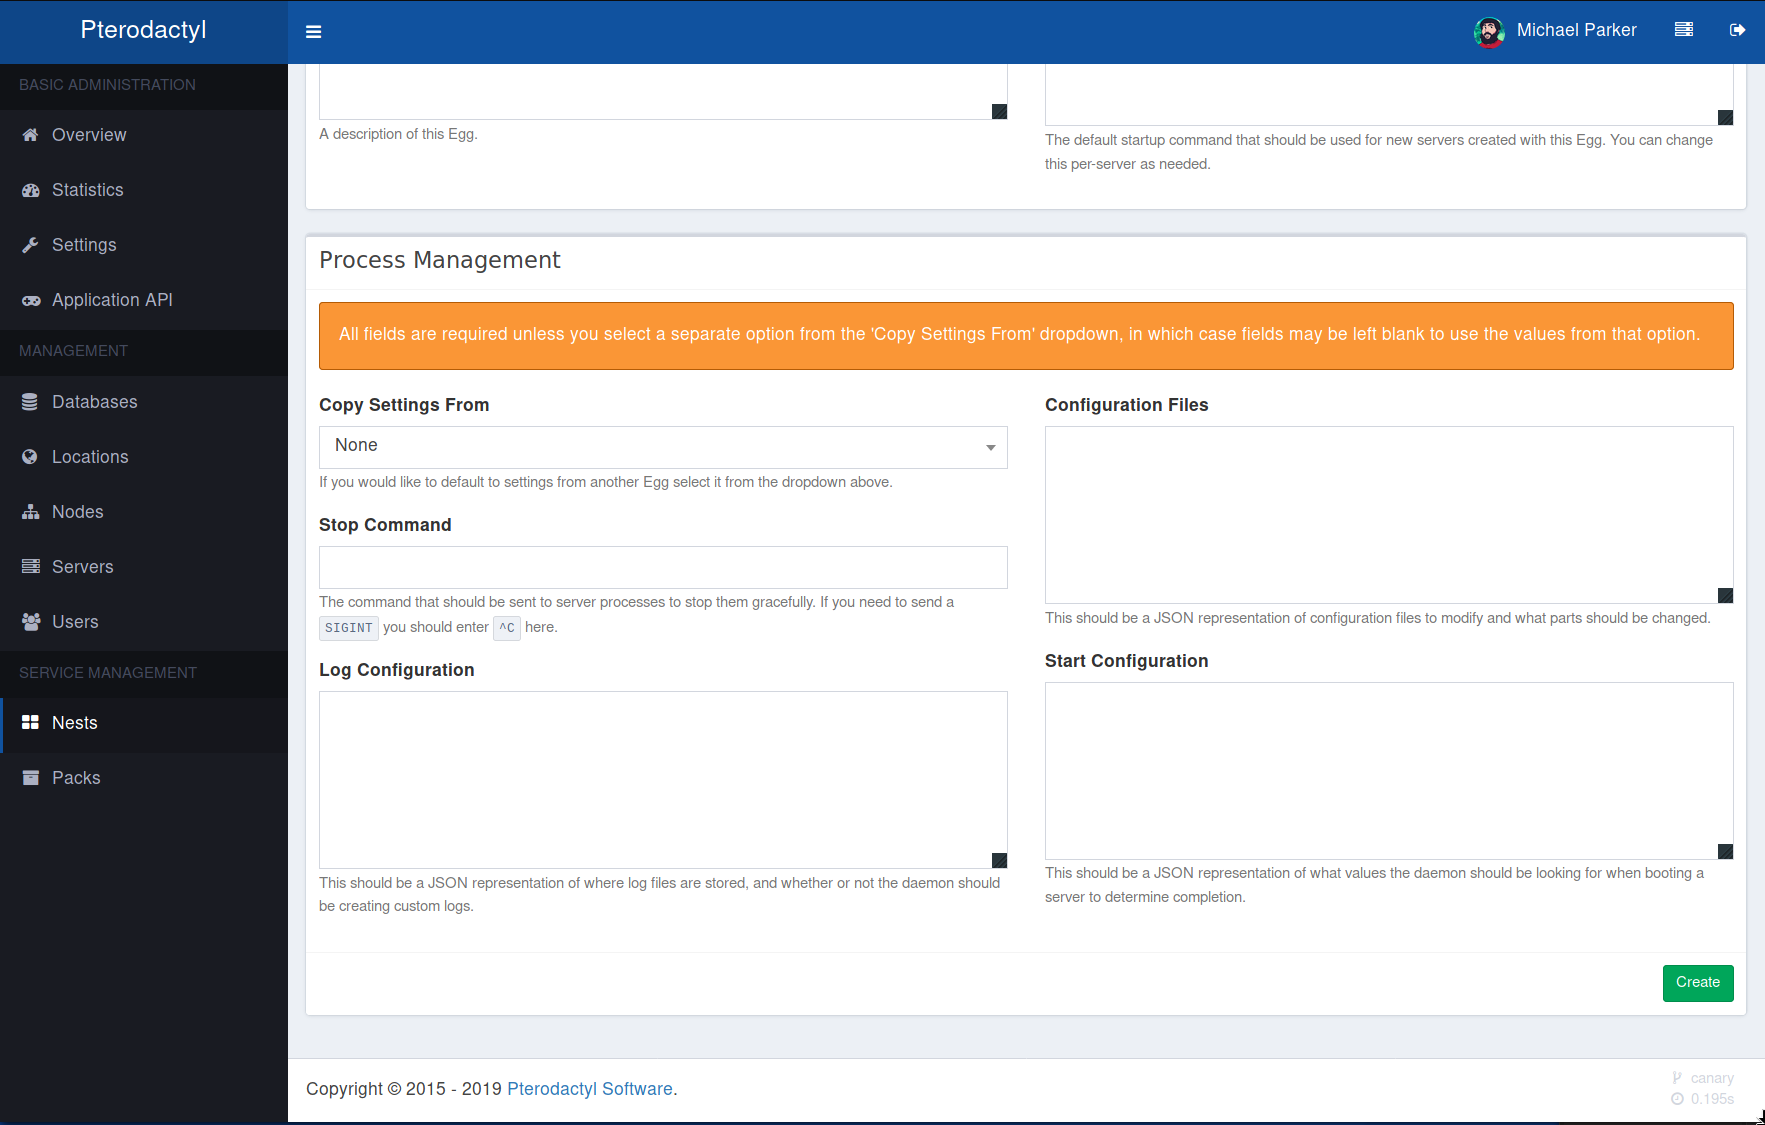
# Configure Process Management
This is perhaps the most important step in this service option configuration, as this tells the Daemon how to run everything.
The first field you'll encounter is Copy Settings From. The default selection is None. That is expected, and okay.
This dropdown is discussed at the end of this article.
# Stop Command
Next, you'll encounter Stop Command and, as the name implies, this should be the command used to safely stop the
option. For some games, this is stop or end. Certain programs and games don't have a specified stop command, so
you can enter ^C to have the daemon execute a SIGINT to end the process.
# Log Storage
Logs are competely handeled by the daemon now and use the docker logs to output the complete output from the server. This can be set like below.
{}
# Configuration Files
The next block is one of the most complex blocks, the Configuration Files descriptor. The Daemon will process this
block prior to booting the server to ensure all of the required settings are defined and set correctly.
{
    "server.properties": {
        "parser": "properties",
        "find": {
            "server-ip": "0.0.0.0",
            "enable-query": "true",
            "server-port": "{{server.build.default.port}}",
            "query.port": "{{server.build.default.port}}"
        }
    }
}
In this example, we are telling the Daemon to read server.properties in /home/container. Within this block, we
define a parser, in this case properties but the following are valid parsers (opens new window):
file— This parser goes based on matching the beginning of lines, and not a specific property like the other five. Avoid using this parser if possible.yaml(supports*notation)propertiesinijson(supports*notation)xml
Once you have defined a parser, we then define a find block which tells the Daemon what specific elements to find
and replace. In this example, we have provided four separate items within the server.properties file that we want to
find and replace to the assigned values. You can use either an exact value, or define a specific server setting from
the server.json file. In this case, we're assigning the default server port to be used as the server-port and
query.port. These placeholders are case sensitive, and should have no spaces in them.
You can have multiple files listed here, the Daemon will process them in parallel before starting the server. When
using yaml or json you can use more advanced searching for elements.
{
    "config.yml": {
        "parser": "yaml",
        "find": {
            "listeners[0].query_enabled": true,
            "listeners[0].query_port": "{{server.build.default.port}}",
            "listeners[0].host": "0.0.0.0:{{server.build.default.port}}",
            "servers.*.address": {
                "127.0.0.1": "{{config.docker.interface}}",
                "localhost": "{{config.docker.interface}}"
            }
        }
    }
}
In this example, we are parsing config.yml using the yaml parser. The first three find items are simply assigning
ports and IPs for the first listener block. The last one, servers.*.address uses wildcard matching to match any items
within the servers block, and then finding each address block for those items.
An advanced feature of this file configuration is the ability to define multiple find and replace statements for a
single matching line. In this case, we are looking for either 127.0.0.1 or localhost and replacing them with the
docker interface defined in the configuration file using {{config.docker.interface}}.
# Start Configuration
The last block to configure is the Start Configuration for servers running using this service option.
{
    "done": ")! For help, type "
}
In the example block above, we define done as the entire line, or part of a line that indicates a server is done
starting, and is ready for players to join. When the Daemon sees this output, it will mark the server as ON rather
than STARTING.
That concludes basic service option configuration.
# Copy Settings From
As mentioned above, there is a unique Copy Settings From dropdown when adding a new option. This gives you the
ability to, as the name suggests, copy settings defined above from a different option.
In the panel, we use this to copy settings that remain the same between similar service options, such as many of the Minecraft options.
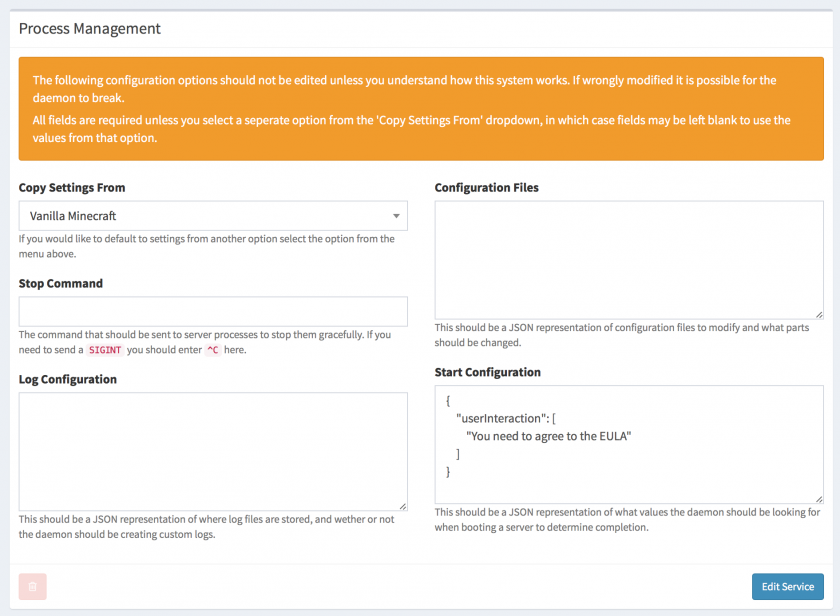
For example, lets look at the Sponge (SpongeVanilla) service option.
As you can see, it as been told to copy settings from Vanilla Minecraft. This means that any of the fields that are
left blank will inherit from the assigned parent. We then define a specific userInteraction line that is different in
Sponge compared to Vanilla, but tell it that everything else should remain the same.
Please note that Copy Settings From does not support nested copies, you can only copy from a single parent,
and that parent must not be copying from another option.
# Egg Variables
One of the great parts of the Egg Variables is the ability to define specific variables that users and/or admins can
control to tweak different settings without letting users modify the startup command. To create new variables, or edit
existing ones, visit the new service option you created, and click the Variables tab at the top of the page. Lets take
a look at an example variable that we can create.
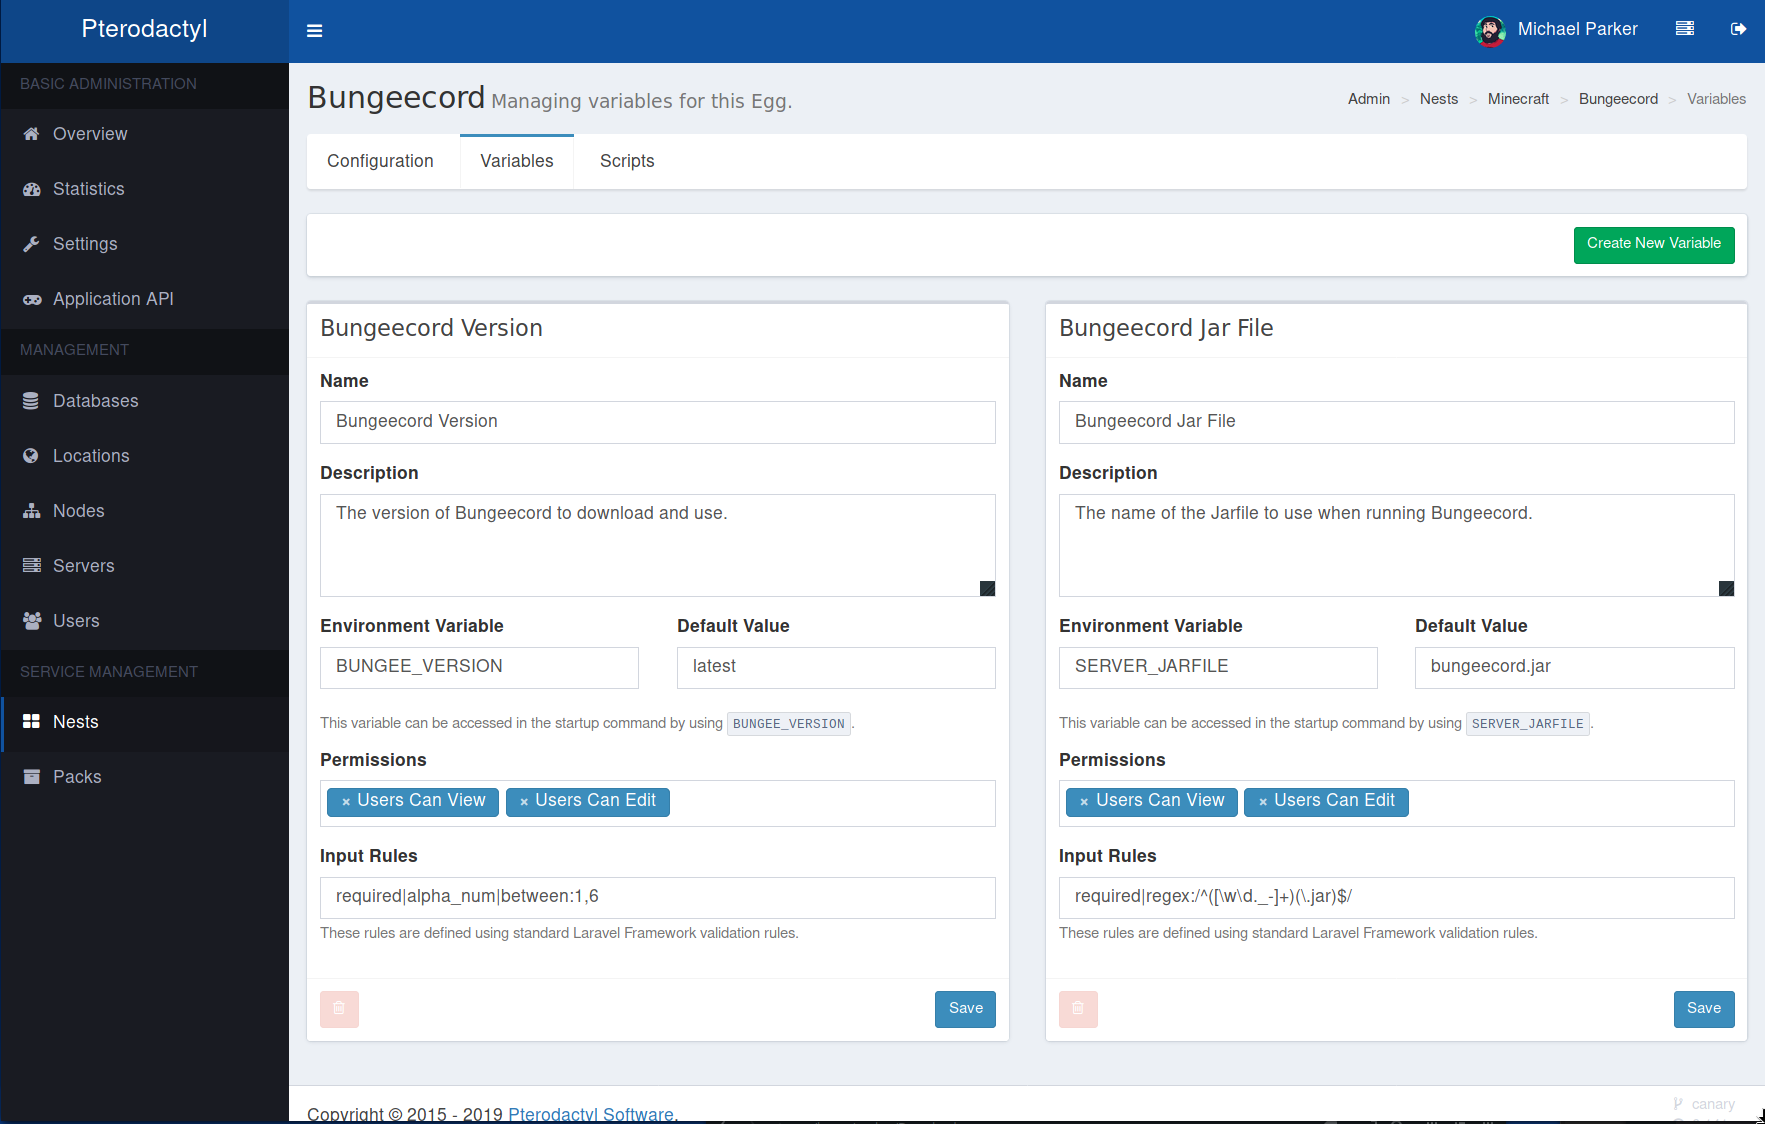
The name and description are rather self-explanitory, so I'll skip down to the Environment Variable box. This should
be an Alpha-Numeric name with underscores, and should be uppercase. This will be the name of the environment variable
which can be accessed in the startup command as {{WOOZLE_WOO}}, within file modifications as {{env.WOOZLE_WOO}}, or
just ${WOOZLE_WOO} in any shell scripts (it is passed through in the environment). We also define a default value for
this environment variable in this example, but it is not required to do so.
The next section is Permissions, which is a dropdown with two options: Users Can View and Users Can Edit.
Users Can View— allows a user to view the field on the front-end, as well as the assigned value of that variable. They will be able to see it replaced in their startup command.Users Can Edit— allows a user to edit the value of the variable, for example the name of theirserver.jarfile if running Minecraft.
You should use caution here, even if you assign neither of the permissions it does not mean that the value will be hidden. Crafty users will still be able to get the environment on their server. In most cases this is simply hiding it from the user, and then used within the Dockerfile to perform actions, thus it is not important for the user to see.
Finally, you will need to define some input rules to validate the value against. In this example, we use
required|string|between:1,10, which means the field is required, must be a string, and must be between 1 and
10 characters in length. You can find all of the available validation rules (opens new window)
on the Laravel website. You can also use ReGEX based validation by using the regex: rule flag. For example,
required|regex:/^([\w\d._-]+)(\.jar)$/ (opens new window) will require the field, and will match the
regex as any letters or numbers (\w\d) including underscore (_), periods (.), and dashes (-) ending in .jar.
They will then be visible when managing the startup for a server in both the Admin CP and on the Front-End.
# List of default variables
The default variables are always accessible to all eggs and don't have to be created separately. They can be used in the egg startup, install script, or the configuration file parser.
| Variable | Description | Example |
|---|---|---|
| TZ | Time Zone | Etc/UTC |
| STARTUP | Startup command of the egg | java -Xms128M -XmxM -jar |
| SERVER_MEMORY | Memory available for the server in MB | 512 |
| SERVER_IP | Default ip of the server | 127.0.0.1 |
| SERVER_PORT | Primary Server Port | 27015 |
| P_SERVER_LOCATION | Location of the server | Example City |
| P_SERVER_UUID | UUID of the server | 539fdca8-4a08-4551-a8d2-8ee5475b50d9 |
| P_SERVER_ALLOCATION_LIMIT | Limit of allocations allowed for the server | 0 |